Category Archives: Casseroles

Country Pie

A slice of cheesy meat-and-rice pie on a plate

I have no idea why this dish is called “country pie”, but that’s what my mom always called it. And, from a quick search, she wasn’t alone. Since most of the versions I’m running across call for instant rice, I’d guess it’s one of those ubiquitous ’70s casserole recipes.

We got a lot of one-dish meat and rice dishes when I was growing up, since it’s fairly quick and easy–and filling on a tight budget. This is a slight twist, involving a rice mixture cooked in a meat crust.

It’s also a great way of using up leftover rice. The one time I tried jasmine rice in this, it turned into an unpleasant-textured solid lump, so I wouldn’t suggest that. Leftover basmati tends to disintegrate when used like this (including brown basmati). Plain long grain rice or medium/long grain brown rice works pretty well. For this batch, I cooked some converted and wild rice we had lurking in the cupboard; sort of like with a red jambalaya, cooking with a tomato sauce like this is what converted rice is good for. 🙂 It keeps a good texture, and there’s enough seasoning that the rather bland taste doesn’t matter.

For a vegetarian version, I have used various veggie loaf mixtures for the crust; my favorite is a lentil loaf similar to this gluten-free one.  As long as you pre-bake the crust until it starts to brown and let it cool to set up a bit before you add the rice filling, it works really well. You can also make up a double batch of the loaf mixture and refrigerate or freeze half of it for later use, to save time.

Country Pie

Meat crust mixture:

  • 1.5 lb. (700g) ground meat — for this, I used the 400g of lean beef we had, bulked out with half a coffee mug of TVP reconstituted with 3/4 of the same cup full of veggie broth with a slug of GF soy sauce thrown in for extra flavor>
  • 1/2 a medium onion, chopped fine
  • 1/4 – 1/2 a sweet pepper, also chopped fine
  • 1 -2 cloves garlic, minced
  • 1 tsp. seasoned salt
  • 1 tsp. mixed herbs / Italian seasoning
  • 1/4 tsp. ground pepper
  • 1 tsp. paprika (optional, but nice flavor)
  • 1/3 c. (75-100 mL) rolled oats — if you can’t tolerate oats, use about 1/2 c. (125 mL) GF breadcrumbs
  • 1 egg
  • A little water if the mixture is dry when you try to mix the oats in

Basically, you’re making a fairly plain meatloaf mixture.

Chopped veggies, largely because they struck me as pretty. 🙂

The reconstituted TVP, mixed up in the baking dish.

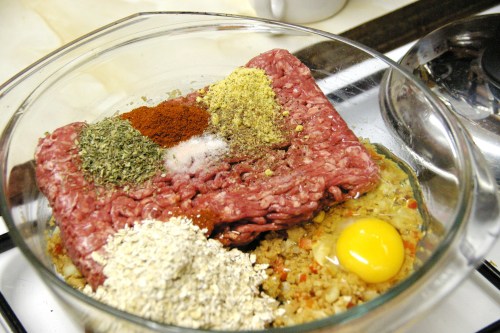
All the crust ingredients in the baking dish

Ready to mix!

Mix it all together, spread it evenly in the dish, and let it sit 20 minutes or so for the oats to rehydrate while you mix up the rice filling.

Preheat the oven to 350°F / 180°C.

Meat mixture spread into a crust in the baking dish

Rice filling

  • 3 c. (750 mL) cooked rice — I cooked a cup (250 mL) of dry for this, with a beef stock cube and some onion (very optional, but nice extra flavor)
  • The other half of the onion, sautéed — That was in the rice here
  • About 1.5- 2 c. (350 – 500 mL) herbed tomato sauce — Spaghetti sauce from a jar is pretty good, but I mixed up my own quick version in a bowl
  • 1/4 tsp. ground pepper
  • Extra mixed herbs/Italian seasoning if required
  • Extra salt, if your rice wasn’t salted
  • About 1.5 – 2 c. (350 – 500 mL) grated cheese — I used a mix of medium Cheddar and Red Leicester

The bowl of tomato sauce and grated cheese on a plate

Mix the sauce into the rice, with the extra seasonings as required. Then stir in the cheese, and try to get it distributed fairly evenly.

Assembly

Bake the meat crust for about 10 minutes, to make sure it gets thoroughly cooked in the middle.

Prebaked meat crust

Fill it with the rice mixture.

Rice filling is now in the meat crust

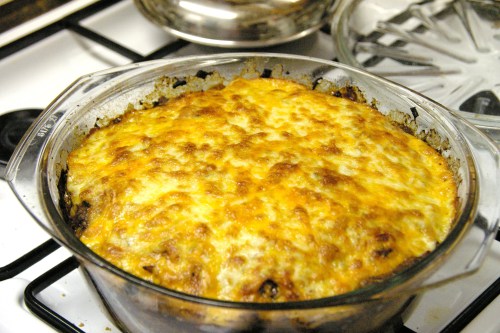
Cover the dish and let it bake for 25 minutes (35 if your rice was cold starting out). Then, remove the lid, spread an additional 1.5 c. (350mL) of grated cheese on the top, and bake it uncovered for another 10-15 minutes until the cheese starts browning. When it’s done, let it sit and cool for 10-15 minutes, and enjoy with a salad!

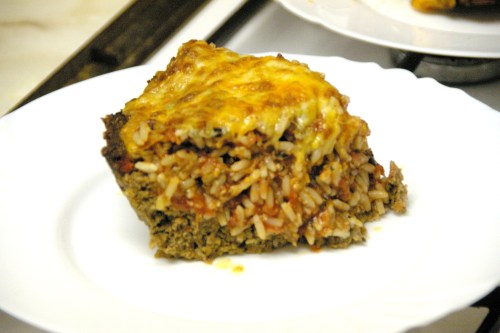
Finished casserole

Basics: Saucy gluten-free macaroni and cheese

Macaroni and cheese is a bit of a staple at our house. When I’m not sure what to cook, it’s likely to satisfy.

Figuring out how to make a good gluten-free version was trickier than I expected, thanks to the very different behavior of all the GF pasta I’ve tried when it sits in liquid. It will go a lot mushier than durum wheat pasta, and will sometimes totally lose structural integrity. Most of the homemade macaroni and cheese I got growing up was of the layered baked custard variety, but that really, really does not work well with corn and/or rice pastas unless you want cheesy paste! I have even tried putting the pasta in raw, and the results were something to behold.

So, I’ve been exclusively making a sauced version. Though it takes a few more steps to put together,  the cooking time is a lot shorter than sticking a dish full of cold milk and eggs in the oven–and the results are delicious. If I’m in a hurry, I’ll just put all the cheese in the sauce and mix it with the hot pasta, but I prefer to top it with more cheese and bake it a while. 🙂

The only place I have seen GF elbow macaroni in Greater London was at Totally Swedish, and it’s at least twice the price of supermarket store-brand pasta, plus either a trek from the burbs into Central London or shipping charges. (Yes, there’s enough demand that we do get store-brand here. The average supermarket’s GF selection here didn’t look too bad, until we went in a grocery store when we were visiting Stockholm! Now I have Free From section envy.)

At any rate, if you can’t easily get hold of macaroni, it works well enough with other small pasta shapes. I like to use Dove’s Farm pipe rigate (shells that hold together well), but what we had on had was either rice-and-corn penne or fusilli from Tesco. This fusilli is really bad about falling apart, so I went with the penne.

Plate with a serving of macaroni and cheese beside a piece of baked chicken

It doesn't look like much, but yum!

Saucy GF macaroni and cheese

  • 8 oz. (250g) pasta
  • Salt for pasta water

Sauce:

  • 3 c. (700mL) milk
  • 3/4 tsp. salt
  • 2 tbsp. butter
  • Ground black pepper and cayenne — I used about 1/4 tsp. of pepper and a pinch of cayenne; you can substitute mustard powder for the chile
  • 1/2 tsp. onion powder
  • 1/4 tsp. garlic powder
  • 2 tbsp. cornstarch, or about 1 tbsp. potato starch
  • Half an 8 oz. (200-300g) package of cream cheese — blame Paula Deen! 😉
  • 8 oz. (250g) grated cheese — I used a mix of mild Cheddar and sharper Red Leicester, for pretty close to a Colby-Jack effect
  • Optional: 1-2 tbsp. grated Parmegiano or Romano
  • Optional: Sprinkle of paprika on top of the cheese

Start the oven preheating to 350F/180C. Cook the pasta in salted water.  When it’s not quite as done as you would normally like, drain it and rinse it in hot tap water to stop the cooking.  (Often a good idea with GF pastas!)

While that’s cooking, put together the sauce. If you’re using cornstarch, just put all the ingredients but the cheese in a pan together, make sure it’s stirred up well, and keep stirring occasionally while you heat it over low until it thickens.

Cold sauce ingredients in a pan

Just turned on the stove

For potato starch, bring it almost to a boil so that you start seeing small bubbles (a full boil will curdle the milk), then take it off the heat and stir well the whole time you’re gradually pouring in the starch mixed into about 2 tbsp. of water or milk. (That’s a small enough quantity that the water isn’t going to dilute the sauce enough to notice.)

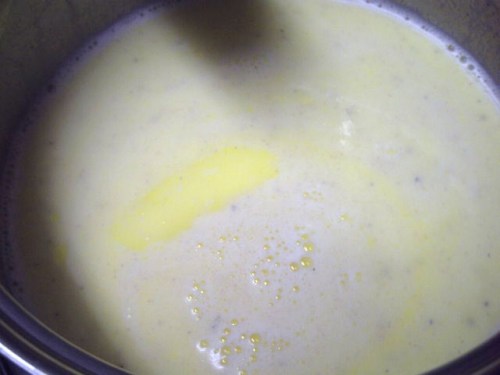
A pan of sauce, almost at a boil

It's almost time to turn off the heat and add the potato starch

When the sauce is thickened, take it off the heat if you haven’t already, and stir in the cream cheese. All I can get here is the spreadable kind in a plastic tub, but if you’re using the more solid kind, you might want to cut it into smallish chunks first. Then add the other cheeses–all the Parmegiano/Romano and about 3/4 of the main cheese–and stir it until the cheese melts in. It doesn’t have to be totally uniform.

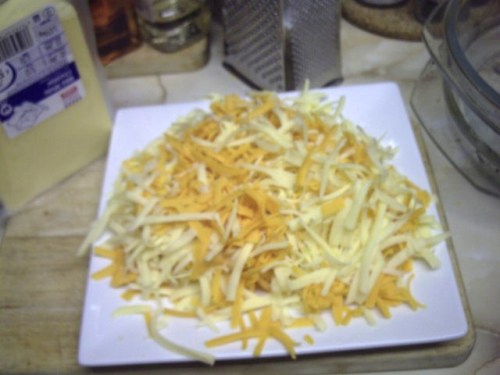
A plate of grated cheese, with mixed orange and creamy white colors

A pan of steaming cheese sauce

Good enough!

Taste the sauce for seasoning. Put the pasta in the buttered baking dish, pour on the sauce, and stir it together. Put the lid on the dish so the top won’t dry out, and bake for about 20-25 minutes at 350F/180C.

Pasta and cheese sauce mixed together in a glass baking dish

Ready to go in the oven, covered

When that’s baked, take off the lid. Spread the remaining cheese across the top, and sprinkle it with paprika if you like. Put it back in, uncovered, for another 10 minutes or so until the cheese on top browns a bit.

Finished dish of macaroni and cheese

It's ready! It turned out looking more yellow here.

Let it sit for about 10 minutes out of the oven to cool, et voilà!

Lazy Cabbage Rolls and Lemony Carrots

A plate with cabbage roll casserole with a dollop of sour cream on top, and sliced carrots

Tasted better than it looked. 😉

Last night, I made a “lazy cabbage roll” casserole with the leftover fried cabbage. It turned out very tasty indeed.

Instead of rice, I decided to try buckwheat in there. The flavors worked well together.

Lazy Cabbage Rolls

  • 1 lb. (400-500g) ground beef
  • 1 stalk celery, chopped
  • 1 onion, chopped
  • 2 cloves garlic, minced
  • 3/4 c. (175mL) buckwheat, rinsed
  • 1.5 c. (350mL) water
  • Beef or veggie stock cubes or powder to make 2 c. (500mL) worth
  • 1.5 tsp. mixed herbs or Italian seasoning
  • 2 tsp. paprika
  • 1/2 tsp. pepper
  • 2 c. lightly seasoned cooked cabbage
  • 14 oz. (400g) can chopped tomatoes
  • Salt and pepper to taste, for the tomatoes
  • Sour cream to serve on top

Preheat the oven to 350F/180C, and have a greased covered baking dish ready.

Fry the meat in a pan over medium-low heat, adding the onion and celery. Cook, stirring occasionally, until the vegetables are translucent and the meat is starting to brown. Stir in the buckwheat, and cook for a couple of minutes. Add the garlic, herbs, paprika, and pepper, and let it cook a couple minutes more.

Pour in the water, and add the stock cubes or powder, making sure it’s dissolved well. Turn up the heat to bring the pan to a boil, then cover it and reduce the heat to low. Let it cook like rice for 20 minutes; if the buckwheat doesn’t look done, give it a few more minutes. No need to let it sit and steam out as usual off the heat, since it’ll be going straight into the oven.

Put the meat and grain mixture into the baking dish, and spread the cabbage evenly on top. Season the tomatoes a bit with salt and pepper, and pour them evenly over the top. Put the lid on, and let it bake for 20 minutes. Then the lid can come off, and it can bake another 10 minutes to remove a little moisture and get a touch of browning on the top.

Let the casserole cool for about 10 minutes. Spoon a dollop of sour cream on top of each serving, and dig in!

Casserole just out of the oven

Just out of the oven

Lemony carrots

We have a surplus of carrots at the moment, so you’re going to be seeing a lot of carrots here for a while. 🙂 For this side dish, I considered making gingered carrots, but decided to put together something simpler without the ginger.

  • 1 lb.  (500g) carrots, peeled and sliced diagonally.
  • Enough water to just cover them
  • Veggie broth powder or cubes to make 2 c./500mL
  • 2 tbsp. butter
  • Juice of half a lemon
  • Salt to taste
  • Optional: herbs (I used a little dried parsley, just for color; dill is great with the lemon)

Boil the carrots in the water with the stock powder/cubes added, covered, for 10 minutes. Drain the carrots, then stir in the butter, lemon juice, herbs, if you’re using them, and additional salt if needed.  Enjoy!